How to Make Goat's Milk and Honey Soap Using Melt & Pour Base
Learn to make a custom crafted, nourishing goat's milk and honey soap without having to deal with lye. This DIY is super easy and perfect for beginners.
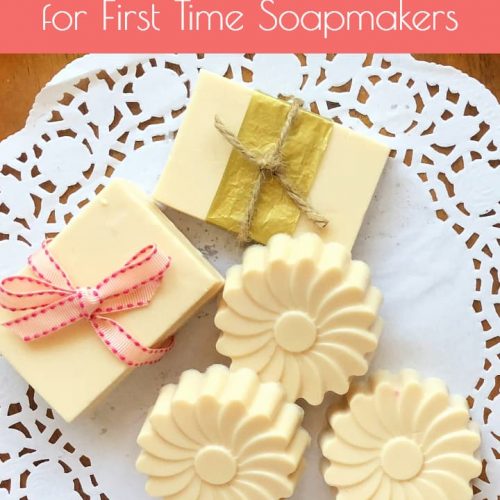
Servings: 6 bars
Cost: $6
Ingredients
Supplies
- 1 pound of Goats Milk Melt & Pour Soap Base or other melt and pour soap base
- 1 - 2 teaspoons Honey
- Microwave Safe Pitcher Jar or Bowl
- Silicone Spatula or Wood Skewer
- Soap Mold Like this or this
- Isopropyl Alcohol in a Spray Bottle
Optional
- Liquid Soap Colorant I use yellow
- Essential Oil or Fragrance Oil
Instructions
- The first thing you need to do is to chop the block of melt and pour soap base into small cubes. The exact size does not matter but the smaller the cube, the more evenly your base will melt. I like to use a soap cutting blade but a good chef's knife will work just fine.
- 1 pound of melt and pour base will make 4 to 6 bars, depending on the size of your mold and the height of each bar.
- Place the chopped base into a microwave safe container. When I first started soaping with melt and pour, I used a Pyrex measuring pitcher. These days, I use plastic BPA-free pitchers that have a long spout that facilitate what I call "the pour".
- Melt your base in a microwave oven using 15 - 30 second bursts. Following each burst, give the base a good stir using a silicone spatula or a wooden skewer. Repeat this process until the base is completely melted. Note that you want to melt the base, not cook it. I have found that melt and pour soap base begins to melt at about 120 degrees and, depending on the type and brand, will be fully melted at about 150 degrees.
- Although you can make a perfectly lovely soap without adding honey, doing so will, in my opinion, make an extra-nourishing bar. In this step, add 1 to 2 teaspoons of honey to your base after it is melted. Be sure to mix well because if you don't the honey will pool in the bottom of the mold and will end up gloopy. I like to use a small whisk to blend in the honey but that is optional.
- The more honey you use, the softer the soap so if you want a harder bar, use less honey.
- If you are planning to use a colorant, add it now. Add the colorant a drop at a time until you reach the desired color. Because goats milk soap base is white, your soap will be a lovely pastel color. Stir well.
- If you desire, add fragrance or essential oils now. My rule of thumb is one teaspoon (about 5 ml or 85 dropof essential oil per pound of base. And yes, that is a lot and it can be expensive. You can also use fragrance oils which are less expensive but since I want to create a more natural soap, I stick with essential oils. As a beginner, I recommend that you skip this part until you become comfortable with the process. And remember, you can make a lovely bar of soap without any fragrance whatsoever. As a matter of fact, in some instances, a fragrance-free soap may be desirable, especially for sensitive skin.
- You are now ready to pour your soap into a mold. I highly recommend using a silicone mold because it will be really easy to remove your soaps from the mold after the fact. Before pouring your soap into a mold, spritz it with alcohol. Fill your mold and again, spritz with alcohol. This will eliminate small bubbles that tend to appear on the top and bottom of your soap.
- Let your soap harden. This will typically take an hour or two although you can hasten things along in the refrigerator. When hardened, remove the soaps from your mold and voila! You now have soap.
- The final step optional. If you are making a large batch of soap and will not be using the bars right away, wrap them in plastic wrap or shrink wrap. This will prevent them from sweating although, to be honest, I have left my bars unwrapped for a month or two and have not had a problem.